The PD Array Matrix ★
The ranked ladder, premium and discount, read as route planning: which array is price leaving, and which is it reaching for. The Live Track opens here.
“There's a ranking, and where price sits relative to equilibrium tells me which half of it I'm allowed to shop from. This is the selection rule I never had.”
The selection rule you never had
You now know six arrays by strict definition, plus the old high or low — seven PD arrays (PD = premium/discount: any level price can be drawn to). On a real chart, several of them are visible at once — a bullish order block below, an unfilled gap above, a breaker to the left, equal highs overhead.
Which one do you use?
Nothing in Tier 2 answered that, and it is the question that has produced six years of paralysis. Your library answers it on one slide, in Month 6, and the answer is not “whichever looks best.” It is a ranked ladder split by premium and discount, and where price sits decides which half of it you are allowed to shop from.
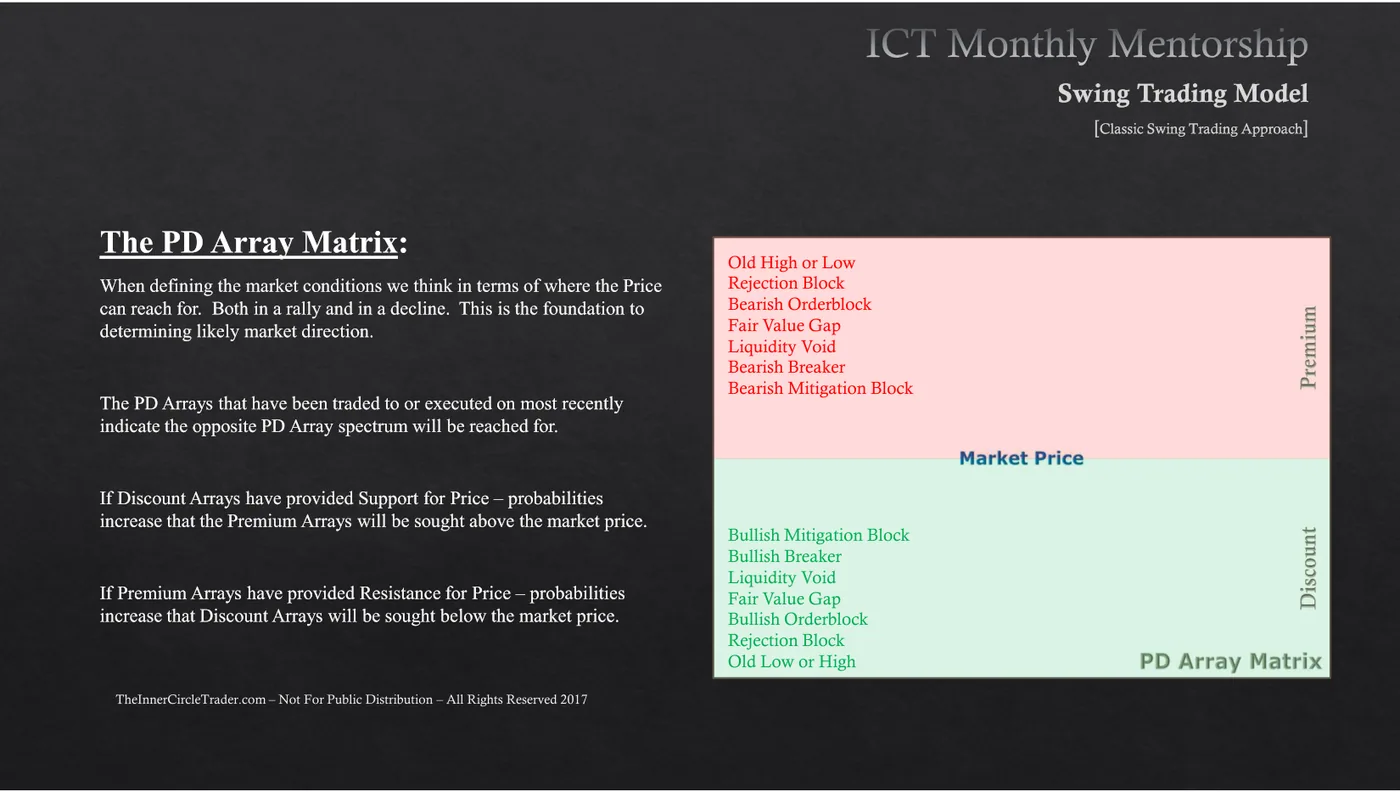
Watch the whole idea move once, then read it slowly below. Keep your eye on the ladder on the right: which half lights up, and when.
Transcript
- Frame the dealing range. Above 50% is premium. Below is discount.
- Month 6’s matrix: seven arrays in each half, mirrored, read outward from price.
- Nearest: the trapped-trader blocks (M7). Then the gaps (M6), then order flow (M5). Furthest: the liquidity itself — the old high or low (M2).
- Price falls from premium, leaves a gap above, and trades into a discount array.
- The discount array held. That is the array most recently worked.
- The rule: discount held, so the opposite half — premium — is what price reaches for.
- Buy from the discount array. Target arrays in the premium half.
- Stand down at equilibrium: neither half is permitted.
- A valid buy array sitting in premium? Wrong half. No trade. A stand-down is a correct answer.
- The selection rule: name the array most recently worked; the opposite half is being reached for. Buy from discount arrays, sell into premium arrays — never the reverse. “Probabilities increase” is ICT’s own hedge; no number is attached to it.
The governing rule
When defining the market conditions we think in terms of where the Price can reach for. Both in a rally and in a decline. This is the foundation to determining likely market direction.
The PD Arrays that have been traded to or executed on most recently indicate the opposite PD Array spectrum will be reached for.
If Discount Arrays have provided Support for Price – probabilities increase that the Premium Arrays will be sought above the market price.
If Premium Arrays have provided Resistance for Price – probabilities increase that Discount Arrays will be sought below the market price.
Three sentences, three separate ideas:
1. “Where the Price can reach for.” Not what price will do — what it can reach. The matrix is a map of destinations, and reading it is route planning.
2. “The PD Arrays that have been traded to or executed on most recently indicate the opposite PD Array spectrum will be reached for.” This is the selection rule. Price alternates between the halves. Whichever half was just worked, the other one is next.
3. The two conditional statements. Discount arrays held → premium is sought. Premium arrays held → discount is sought. Same claim, spelled out in both directions with “probabilities increase” rather than “will”.
The consequence you have been missing for six years: you buy from discount arrays and sell into premium arrays. Every trade is one array to another, from one half to the other. That single sentence eliminates most of what is on your chart, because roughly half the visible arrays are in the half you are not permitted to use.
"The PD Arrays that have been traded to or executed on most recently indicate the opposite PD Array spectrum will be reached for." What does this let you do that nothing in Tier 2 did?
The ladder, in order
Both halves list the same seven objects, mirrored.
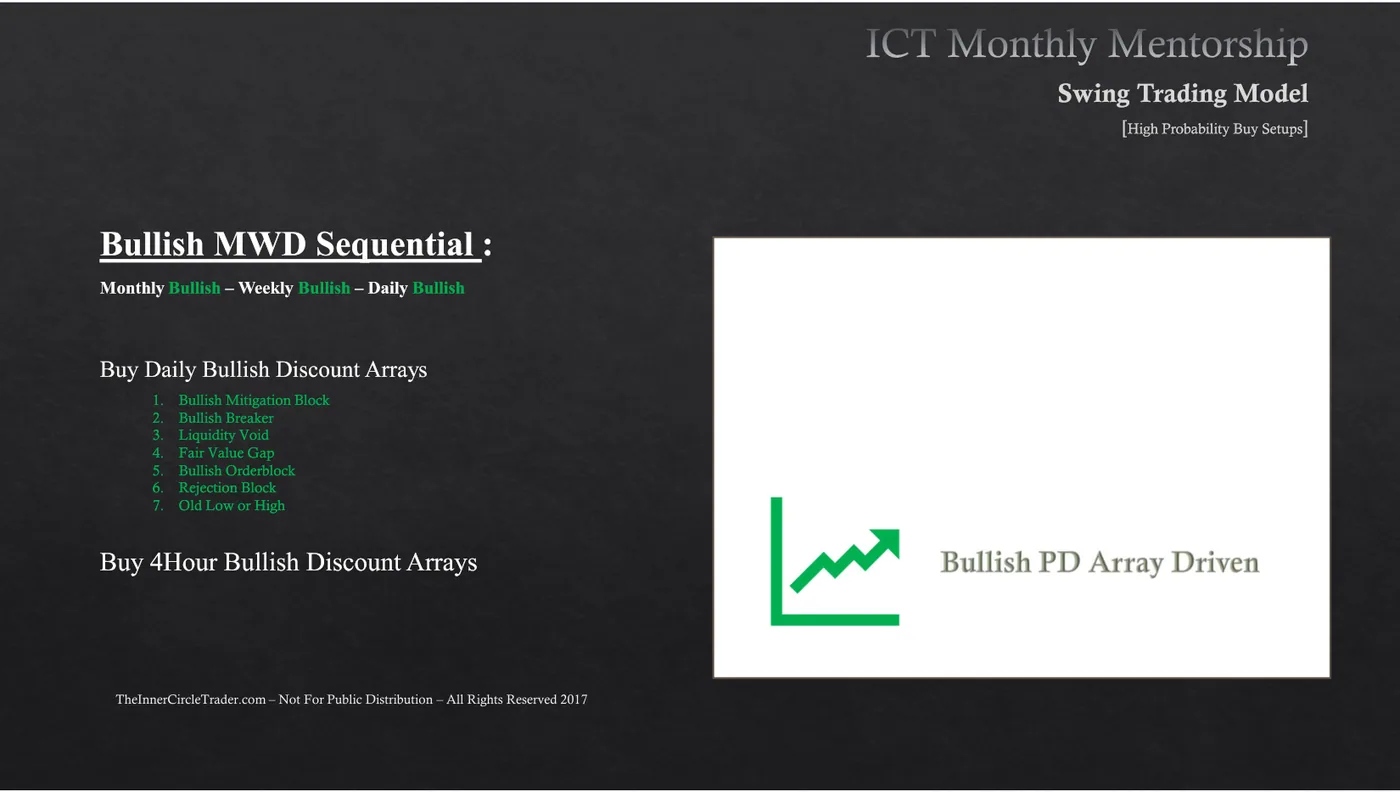
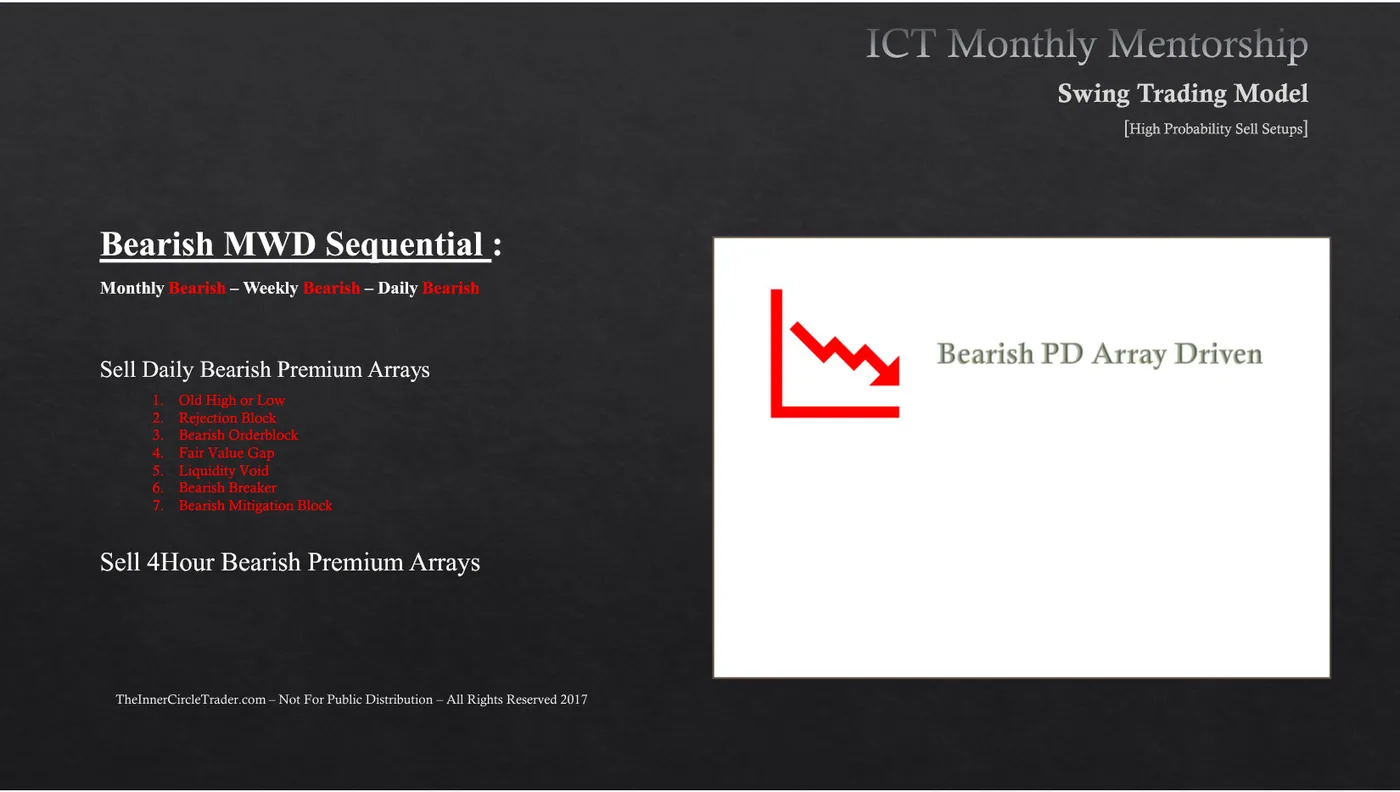
The full ladder, nearest to market price first:
| Rung | Discount half (below price) | Premium half (above price) |
|---|---|---|
| 1 (nearest) | Bullish Mitigation Block | Bearish Mitigation Block |
| 2 | Bullish Breaker | Bearish Breaker |
| 3 | Liquidity Void | Liquidity Void |
| 4 | Fair Value Gap | Fair Value Gap |
| 5 | Bullish Orderblock | Bearish Orderblock |
| 6 | Rejection Block | Rejection Block |
| 7 (furthest) | Old Low or High | Old High or Low |
Two structural facts fall out of that table, and both are useful:
The outermost rung is external range liquidity. Old high or low — M2’s destination, sitting at the far end of both ladders. Everything between price and it is internal: the route.
The inner rungs are the trapped-trader objects, the middle rungs are the inefficiencies, and the outer rungs are the residue and the pools. The ladder is not arbitrary. Reading outward from price you pass the freshest traps first, then the unfilled inefficiencies, then the older order-flow levels, then the liquidity itself.
What sits on the outermost rung of both ladders, and why does that matter?
Daily EURUSD. You have anchored the dealing range from a confirmed intermediate-term low to a confirmed intermediate-term high. Price has retraced into the lower third of that range and has just held a bullish order block, closing back above it. Above price, inside the range, sits an unfilled fair value gap; above the range high sit three weeks of equal highs.
- Price sits
- discount
- Most recently traded to
- Bullish Orderblock (discount) — price held it
- Timeframe
- whatever you framed the range on
1Which half of the ladder are you shopping from?
Not "which do I like" — which half does the rule permit, given where price sits and which arrays have just been worked?
2Rank the chosen ladder, nearest to market price first
- 1—
- 2—
- 3—
- 4—
- 5—
- 6—
- 7—
3Name the one array you trade FROM and the one you trade TO
Reading it as a route, not as a signal list
Here is the mental shift the module is for.
Before: a chart has seven possible setups on it and you pick one. Whichever you pick, six other things are also visible, so any loss looks like evidence you picked wrong.
After: a chart has a position — price is somewhere on a ladder — and a direction of travel — toward the other half. The arrays are not competing signals; they are stations on a route between two destinations.
The three questions of the matrix, in order:
- Which array was most recently traded to or executed on? That tells you which half has just been worked.
- Therefore which half is being reached for? The other one, by the rule.
- So: which array do I trade FROM, and which do I trade TO? From the nearest valid array in the half you are shopping in; to an array in the opposite half.
That is the entire Matrix Drill, and it is the course’s central assessment because it is the answer to the central gap.
Daily GBPUSD. The range is anchored to two confirmed intermediate swings. Price rallied through an old high, failed, and came back down through the swing low that had supported the rally — a bearish breaker. It has now rallied back to that swing low, which sits in the upper third of the range. Below the range low there is a clean double bottom from three weeks ago.
- Price sits
- premium
- Most recently traded to
- Old High or Low (premium) — it was raided and rejected
- Timeframe
- whatever you framed the range on
1Which half of the ladder are you shopping from?
Not "which do I like" — which half does the rule permit, given where price sits and which arrays have just been worked?
2Rank the chosen ladder, nearest to market price first
- 1—
- 2—
- 3—
- 4—
- 5—
- 6—
- 7—
3Name the one array you trade FROM and the one you trade TO
Daily USDJPY. The range is cleanly anchored. Price is sitting within 1% of the equilibrium of that range and has been oscillating around it for four sessions. There is a valid bullish order block 30 pips below and a valid bearish order block 40 pips above, and pools at both extremes of the range.
- Price sits
- equilibrium
- Most recently traded to
- nothing — neither half has been worked recently
- Timeframe
- whatever you framed the range on
1Which half of the ladder are you shopping from?
Not "which do I like" — which half does the rule permit, given where price sits and which arrays have just been worked?
2Rank the chosen ladder, nearest to market price first
- 1—
- 2—
- 3—
- 4—
- 5—
- 6—
- 7—
3Name the one array you trade FROM and the one you trade TO
Carrying the matrix down the timeframes
Month 6 and Month 7 both show the ladder repeated across timeframes.
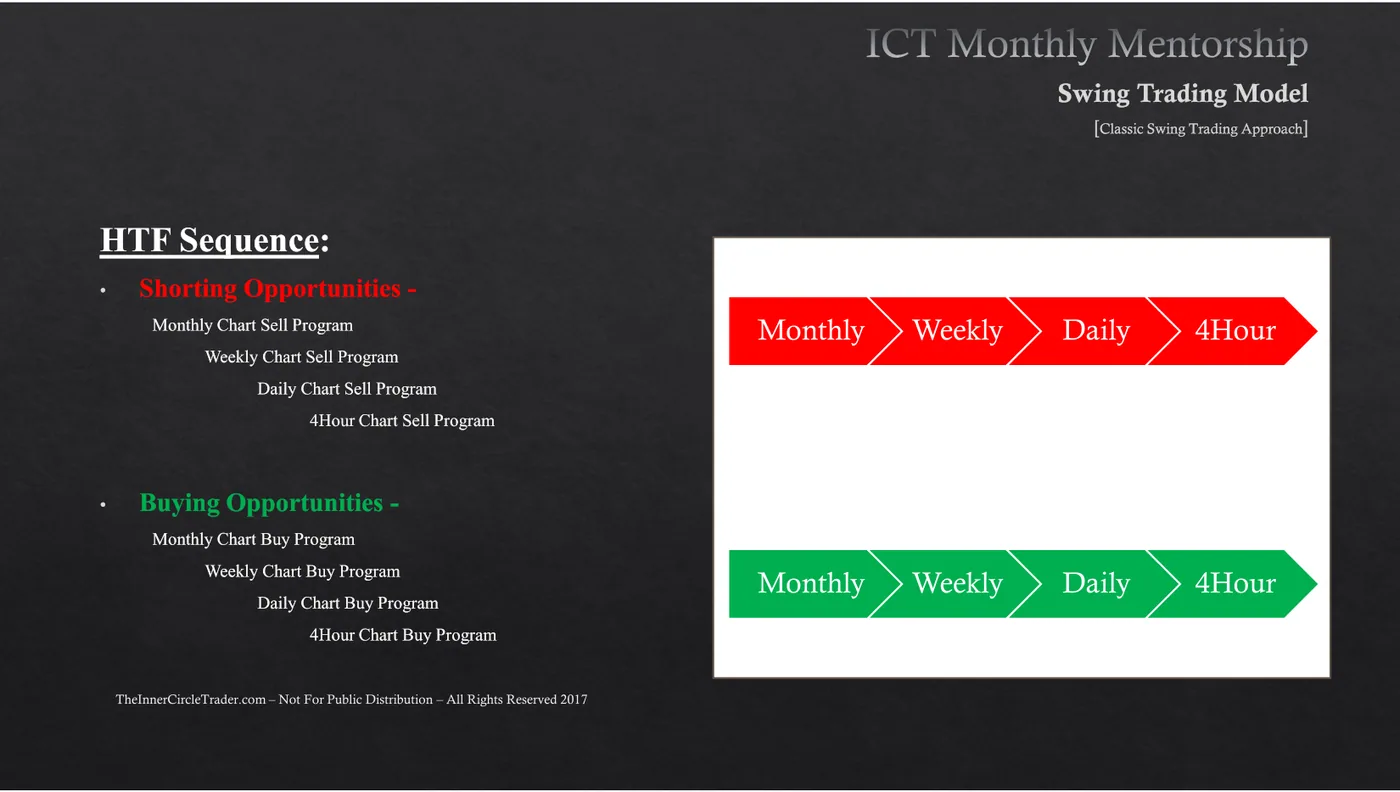
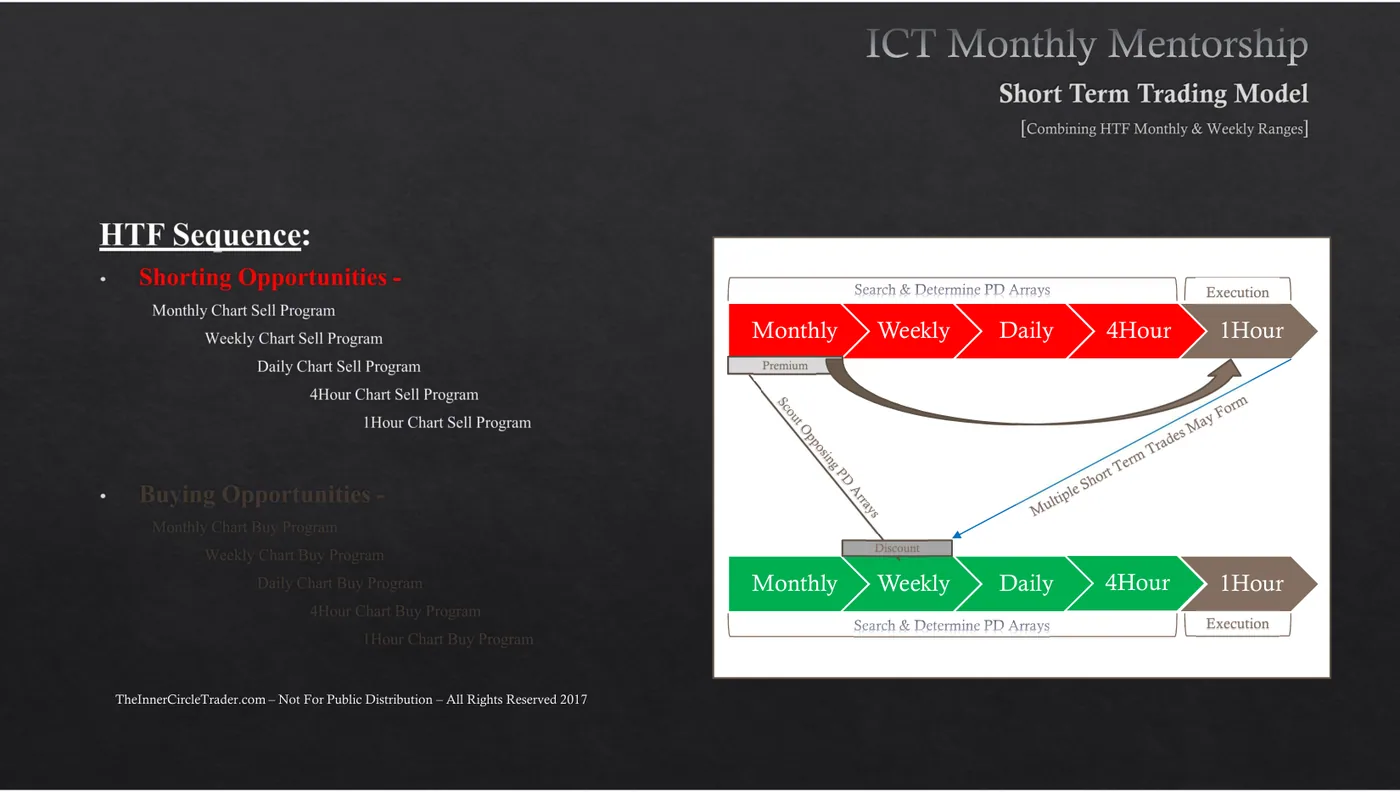
The discipline, which is M3’s authority rule again in different clothes:
- The highest timeframe you frame on decides which half you are shopping in. For your swing default, the daily.
- Lower timeframes locate the specific array within that half. The 4-hour gives you the level; the 1-hour times the fill.
- A lower-timeframe array in the wrong half of the higher-timeframe range is not a trade. This is the single most common way the matrix gets misused: a perfectly valid 1-hour bullish order block sitting inside daily premium.
M10 makes this a full procedure with a gating rule for each timeframe. Here it is enough to hold that the ladder nests, and the higher chart has authority.
Daily AUDUSD is in the upper part of its dealing range, having just been rejected from a bearish order block. You drop to the 1-hour and find a textbook validated bullish order block with a clean 25-pip stop, and a fair value gap just above it. It is tempting.
- Price sits
- premium
- Most recently traded to
- Bearish Orderblock (premium) — price was rejected from it
- Timeframe
- whatever you framed the range on
1Which half of the ladder are you shopping from?
Not "which do I like" — which half does the rule permit, given where price sits and which arrays have just been worked?
2Rank the chosen ladder, nearest to market price first
- 1—
- 2—
- 3—
- 4—
- 5—
- 6—
- 7—
3Name the one array you trade FROM and the one you trade TO
When the matrix says stand down
The rule has a failure state, and recognising it is graded.
Stand down when —
- price is at equilibrium — the 50% line of the dealing range. Neither half is permitted (M4). There is no “from” and no “to”.
- the array you would trade from is in the half you are not shopping in. Valid array, wrong half, no trade.
- the path to the opposite half is furnished with several untouched arrays. That is M2’s high-resistance run, and it means the trade will most likely stall mid-route.
- you cannot name which array was most recently worked. Without that, step one of the rule has no input, and the rest is guessing with a ladder drawn on it.
In the Matrix Drill, “stand down” is a checkbox and it is worth full marks when it is right. Roughly a quarter of the graded drills in this course are of this shape, deliberately.
Which of these are grounds to stand down rather than pick an array? (Select all that apply.)
Weekly XAUUSD framed a wide range; the daily is your framing chart. Price sold off hard from the premium half, leaving a large one-sided range behind it, and is now sitting in the discount half having just filled a bullish fair value gap and turned up from it. The daily range low has a single clean swing low beneath it from last month.
- Price sits
- discount
- Most recently traded to
- Fair Value Gap (discount) — price filled it and turned
- Timeframe
- whatever you framed the range on
1Which half of the ladder are you shopping from?
Not "which do I like" — which half does the rule permit, given where price sits and which arrays have just been worked?
2Rank the chosen ladder, nearest to market price first
- 1—
- 2—
- 3—
- 4—
- 5—
- 6—
- 7—
3Name the one array you trade FROM and the one you trade TO
How does the matrix change what your trading record can tell you?
The decision rule
- When
- You have a chart with more than one valid array visible and you have to choose.
- Then
- Name the array most recently traded to. Take the opposite half as the direction being reached for. Enter from the nearest valid array in the half price is currently in, and target an array in the opposite half — buying from discount arrays, selling into premium arrays, never the reverse.
- Otherwise
- If price is at equilibrium, if the only valid array is in the half you are not shopping in, or if you cannot name what was most recently worked, stand down. A stand-down is a correct answer and is graded as one.
Done with M8?
Mark it complete only if you could teach the decision rule to someone else without scrolling back up. Completion is stored in this browser.